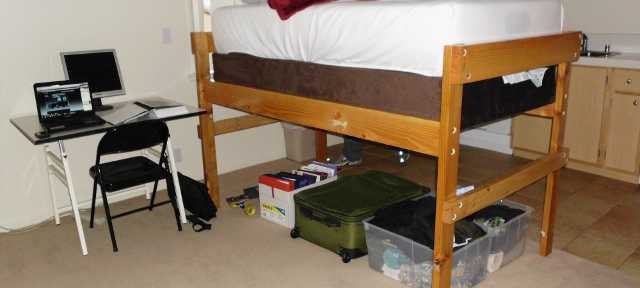
My son moved into an apartment for college. Understandably, it had limited space, so he wanted a bed with storage space underneath. Nothing like that was readily available at IKEA. So we built our own. Plans are downloadable below.
This is the bed, with ample storage space underneath.Easily transported in pieces.1/2″ socket is the only tool required for assembly.
Measuring tape, marker, 5/16″ bit, 3/16″ bit (5 1/2″ long), 1″ spade bit, 1/2″ socket wrench, electric drill
Assuming that the lumber yard or hardware store can cut the lumber to size, these are the minimal tools needed to construct the bed. A person of skill will be able to do a good job with just the above.
Minimal
Better
Tape measure
Framing square
Drill, preferably electric
Drill guide, Drill press
1/2” wrench of some type
Ratcheting socket wrench
Unfinished wood
Sand and apply coats of polyurethane finish
Use a drill guide or press if you have oneIf you do not have a drill guide, use a piece of tape to mark the correct depth for drilling
Construction Tips
The whole thing just screws together in a straightforward manner. The only detail that merits mention is how to do the countersunk holes.
Put scrap wood under the work piece, and drill through 3/16″ holes in the appropriate places.The top piece can now be used as a template to locate the pilot holes on the piece that it attaches to.Switch back to scrap wood underneath. Use the 1″ spade bit to drill a 1/4″ deep countersink. This is optional, but will hide the screw heads so that nothing snags on them.Finally, enlarge the 3/16″ pilot hole to 5/16″. This allows the screw to slip freely through. Obviously, the pilot hole on the underlying piece should NOT be enlarged.Put a washer into each countersunk hole when assembling the bed.