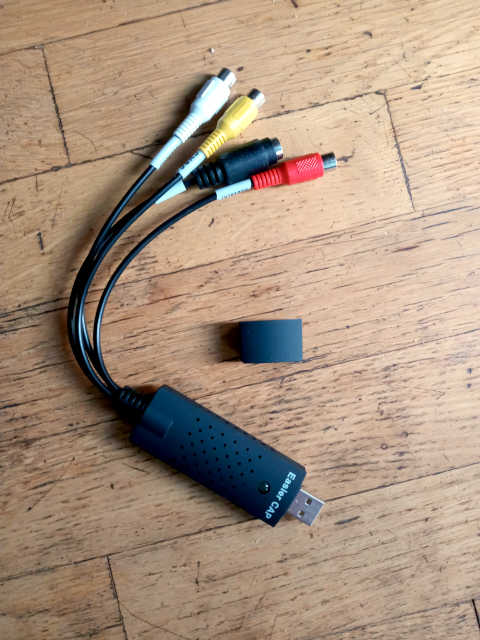
This was about $9 on eBay, including tax and shipping. It came in a small soft pack, that easily fits through a mail slot. Note: some sellers seem to be giving fake tracking numbers for this product, or might claim that it was delivered, but subsequently lost. The fact that this will slip through a mail slot makes it unlikely that a porch pirate would have stolen it. As with anything, I suggest only dealing with vendors that have 99.0% positive feedback or better.
Package included:
- The AV converter device itself, which is somewhat larger than a USB flash drive. There is a cap for the USB, which I’ll probably never use. There is an S-Video input (which I did not test), and yellow-red-white inputs for composite video and stereo audio.
- A USB extender cable. This is a nice touch for those with a hard-to-access USB port on their PC or laptop. I’ll probably never use it.
- Honestech video capture software, and possibly drivers, on a 3″ CD. Unfortunately, many modern computers don’t have a CD/DVD drive. It’s probably possible to download the software from the internet, but I didn’t look, personally. Also, if you are using Windows 10 or Ubuntu 22.04, I can testify that you won’t need to load any drivers or use the capture software. Supposedly, the device works without extra drivers on a Mac, too, but I didn’t test that.
The native capture size seems to be 640×480, although 720×480 was captured from Honestech software. This is good enough for VHS.
On Linux, I used the free OBS Studio for capture. The process is detailed below.
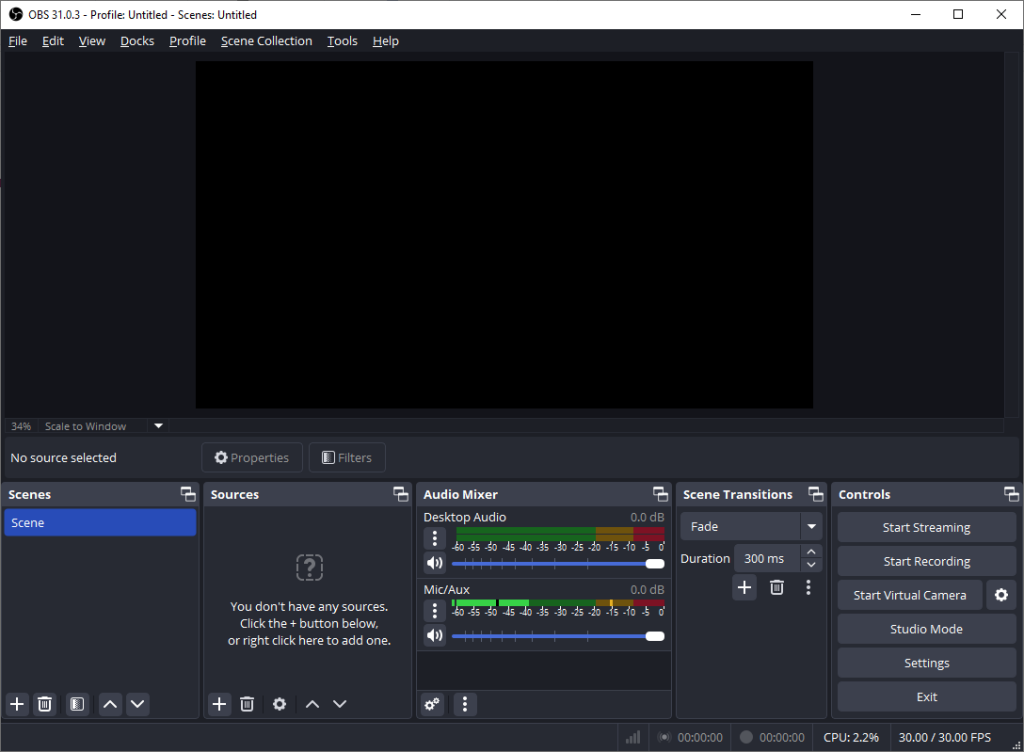
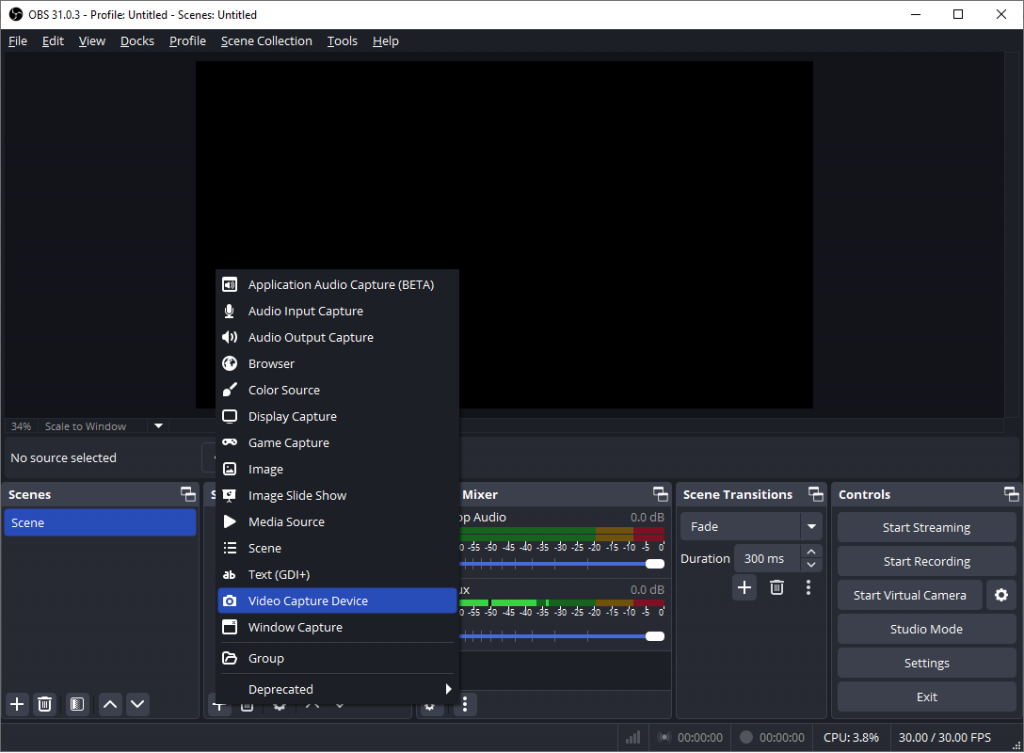
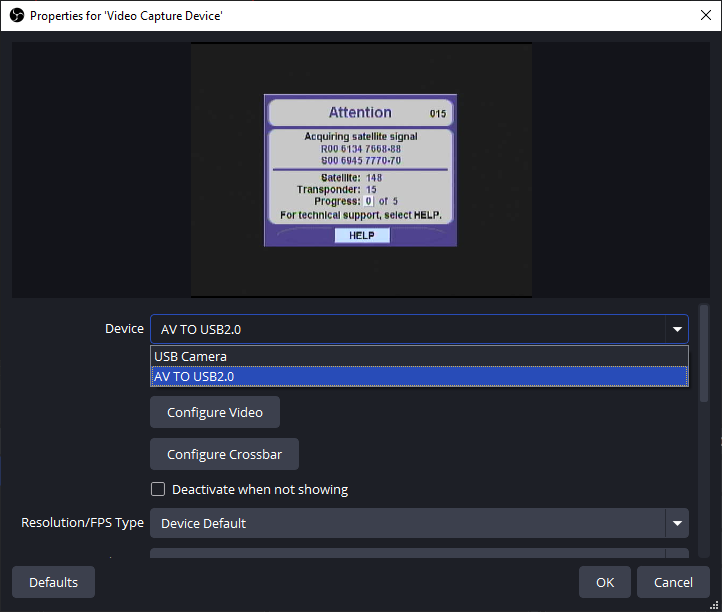
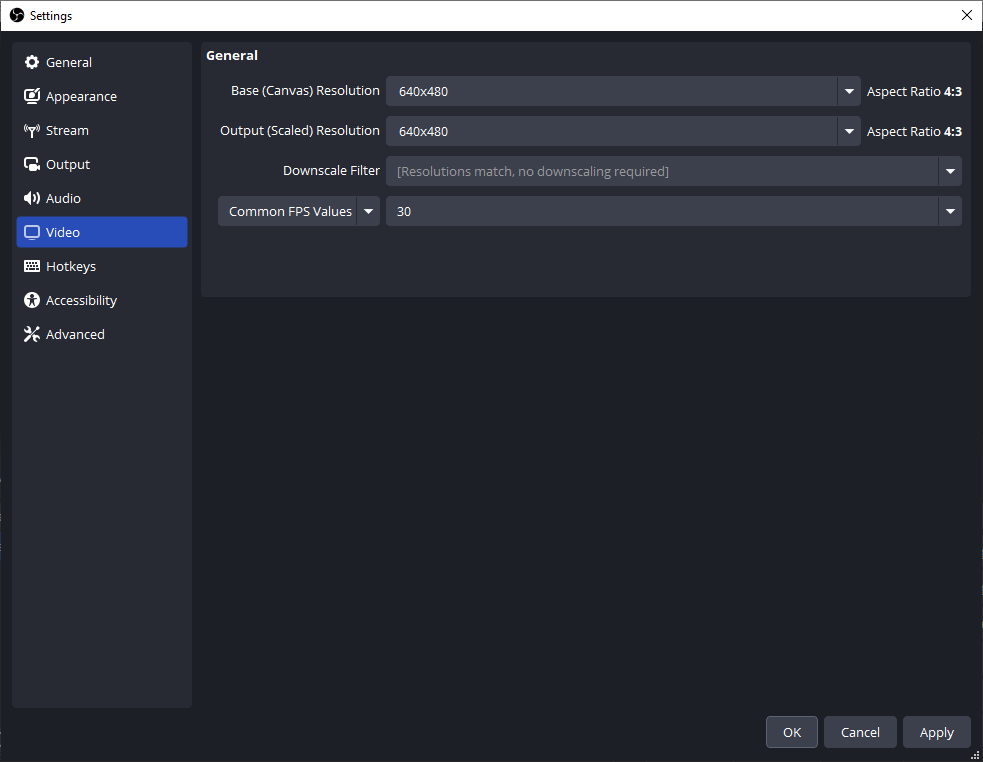
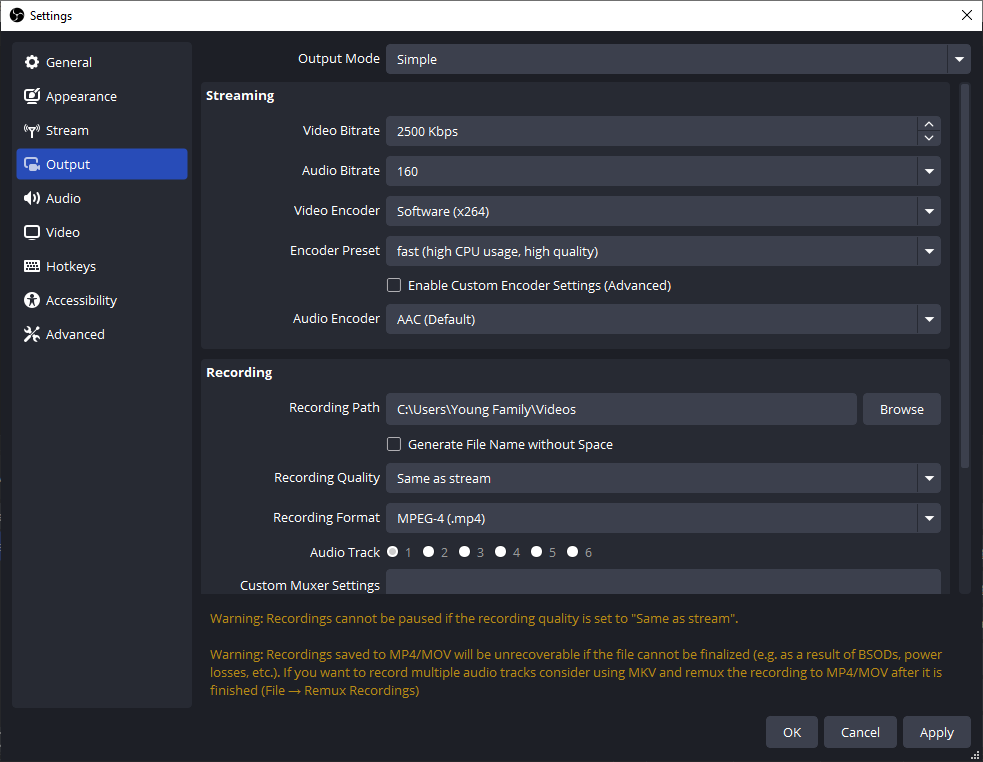
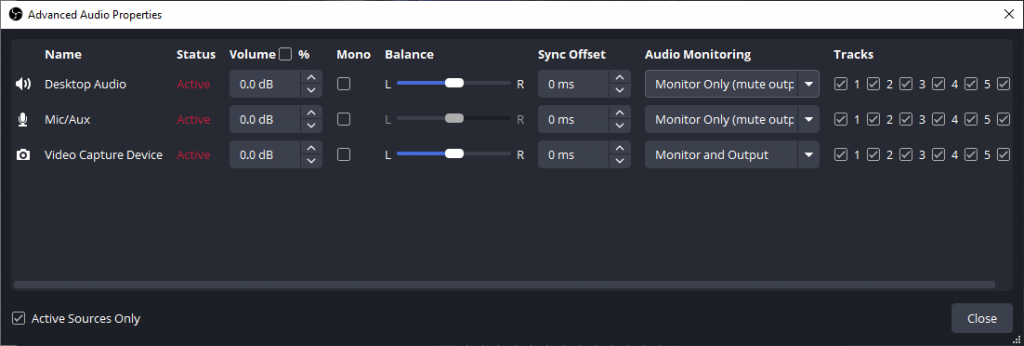
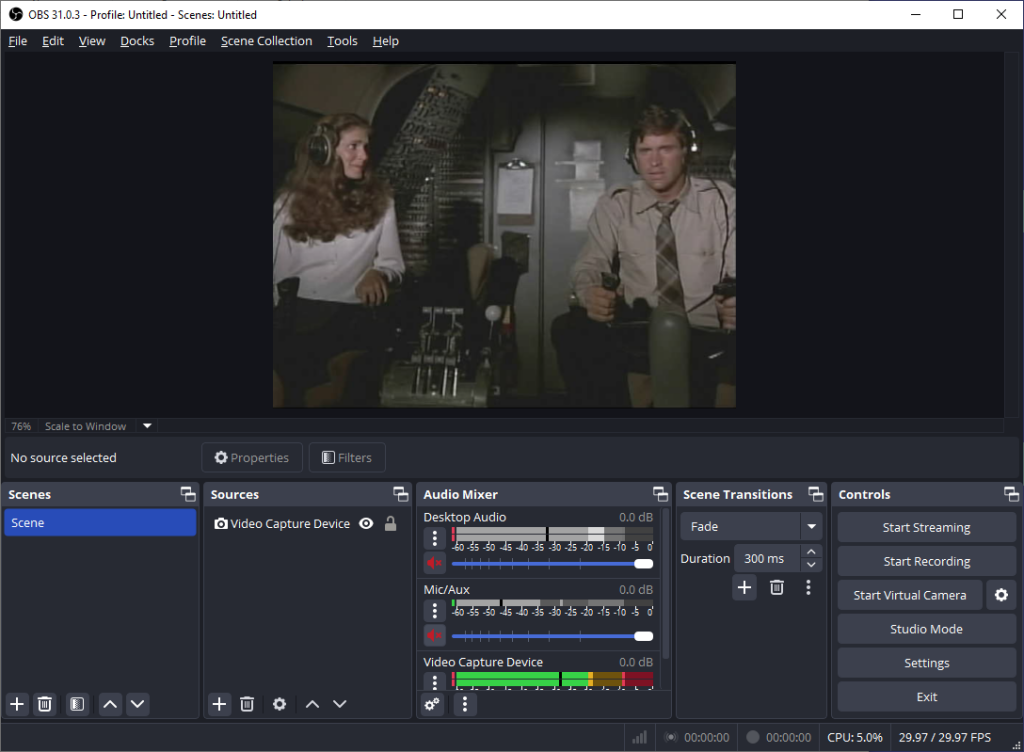
To record, on the main screen, under Controls, click Start Recording. To stop, click the same button, which Stop Recording. The recording is saved to the location specified in Output settings above, in the format specified.
I tried capture with VLC. It worked under Windows 10, but did not work on Linux for some reason.
I tried included HonesTech software. It worked, but the audio lagged when I captured on my netbook. Possibly my processor too weak to keep up. A desktop with an i5 had no issues. HonesTech is a Windows program.
My captures were of old 8mm movies that were videotaped in the 1980’s. Unfortunately, the original film was lost, and all I had was a copy of the tape on VHS, not even the original. And in EP mode, no less. Better than nothing. It was important for me to use a good VHS player. Those are hard to come by, nowadays. I bought three (used) before finding one that would steadily sync with the tape.