I thought I had a simple request. I wanted to save the contents of a Window in my WINAPI application to a png file. At first, I looked at Gnuwin32 for a precompiled version of libpng for Windows, but found that the version offered was dated, and required use of DLL’s. So it was necessary to recompile the source myself. Here are the steps I followed.
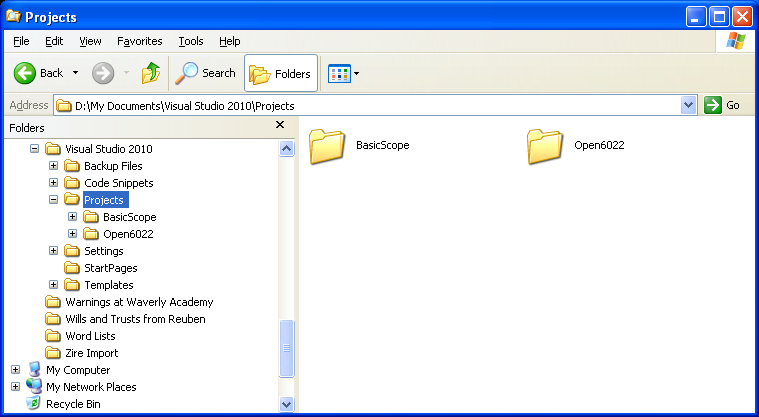
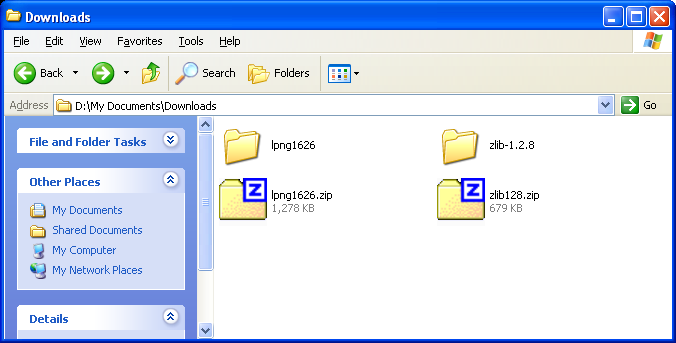
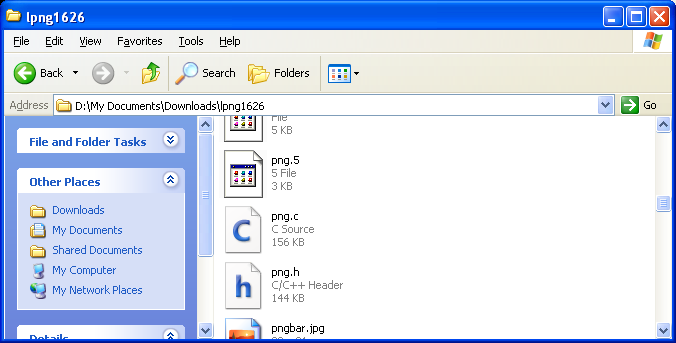
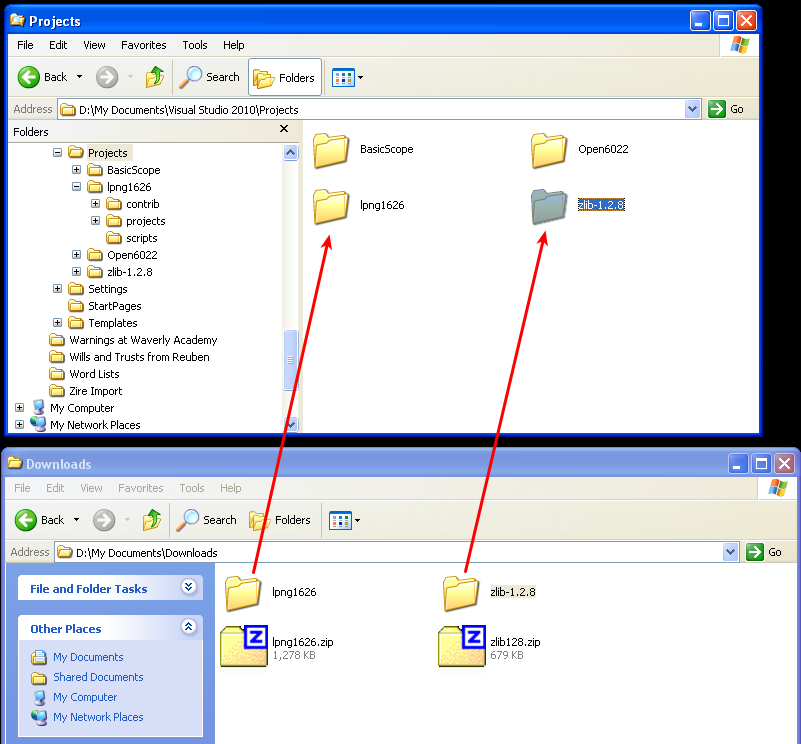
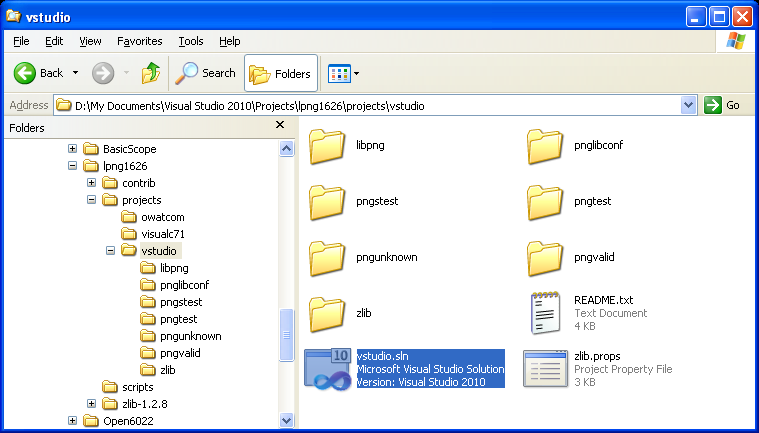
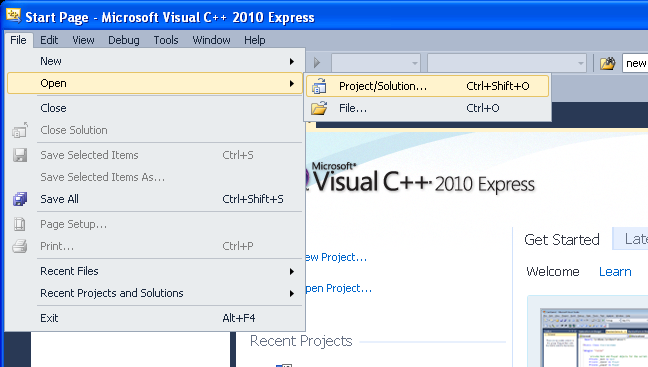
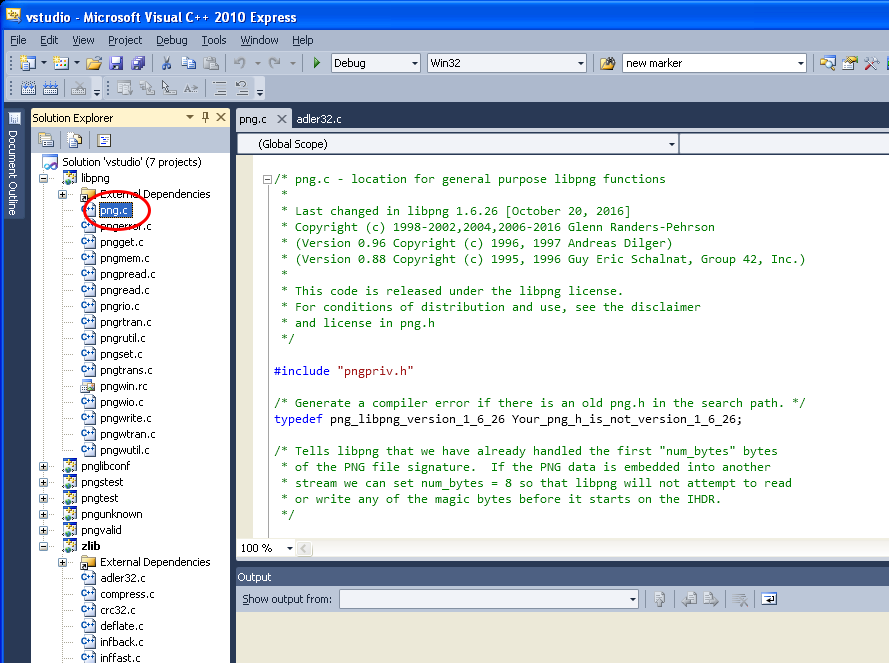
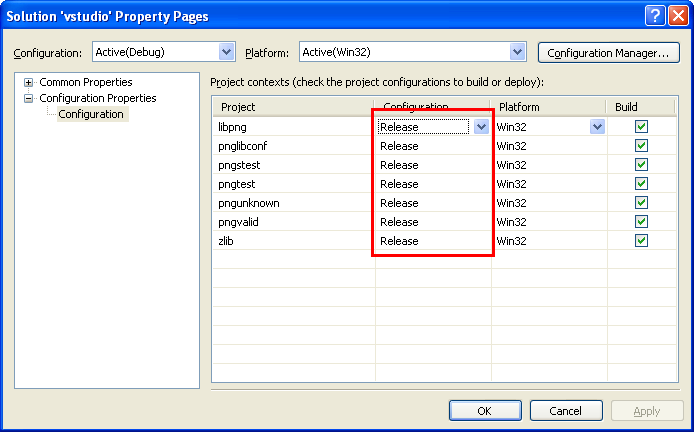
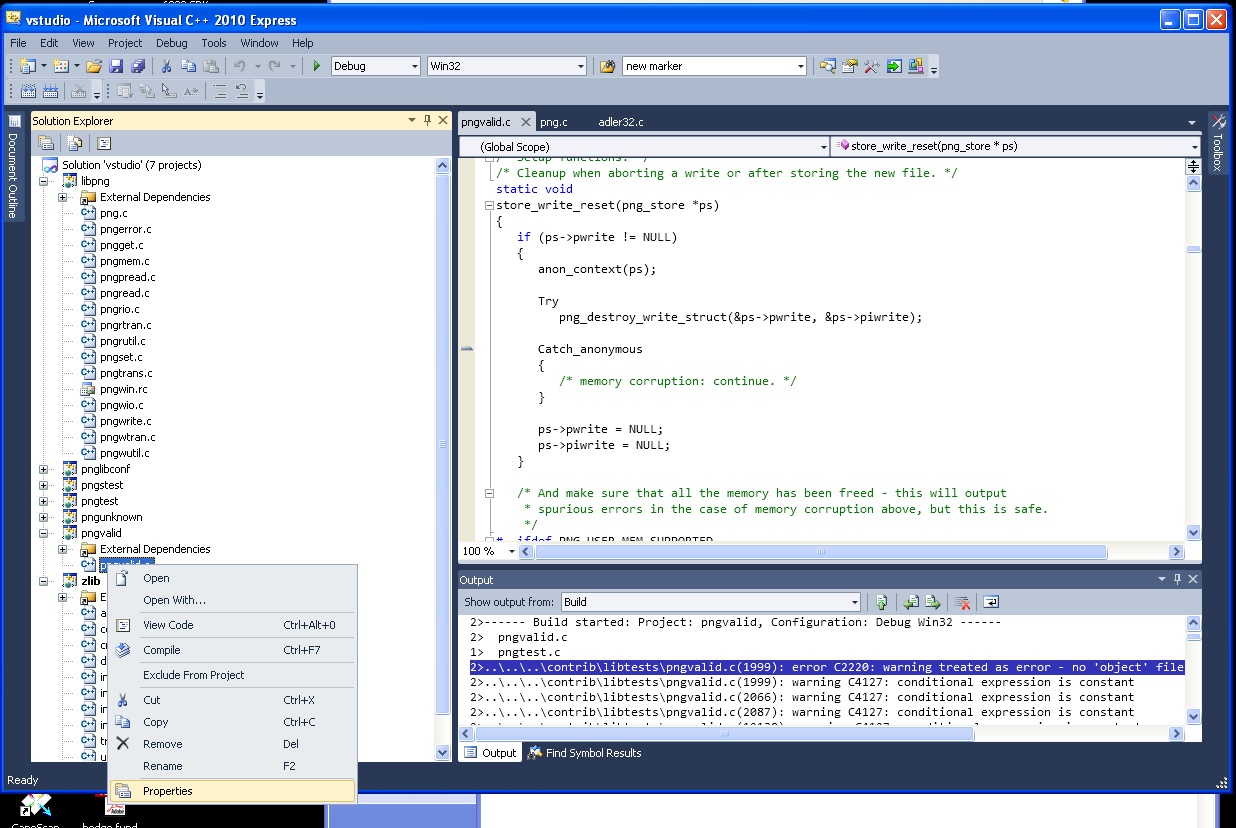
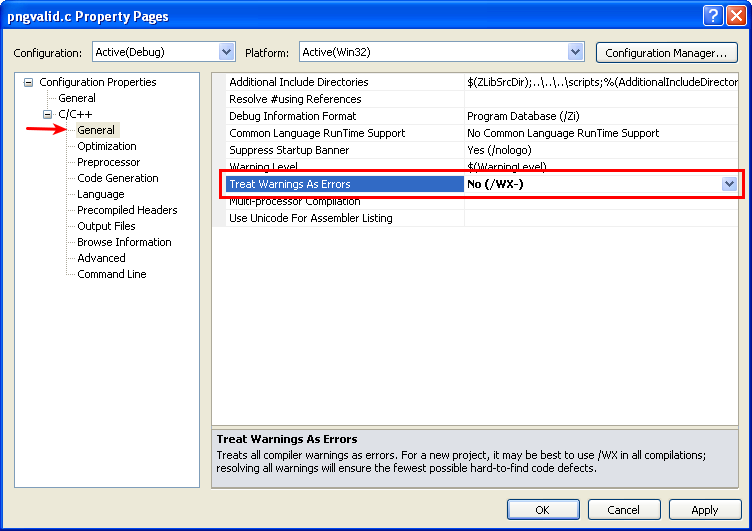
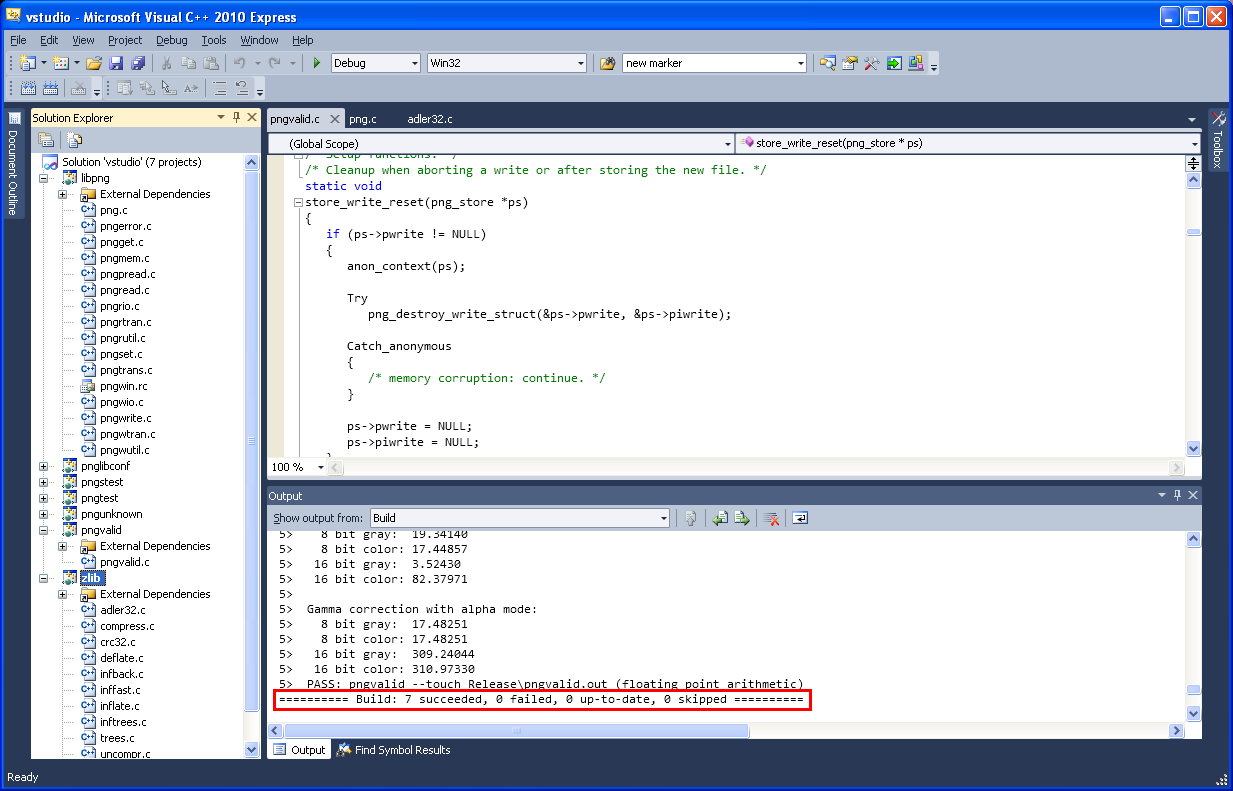
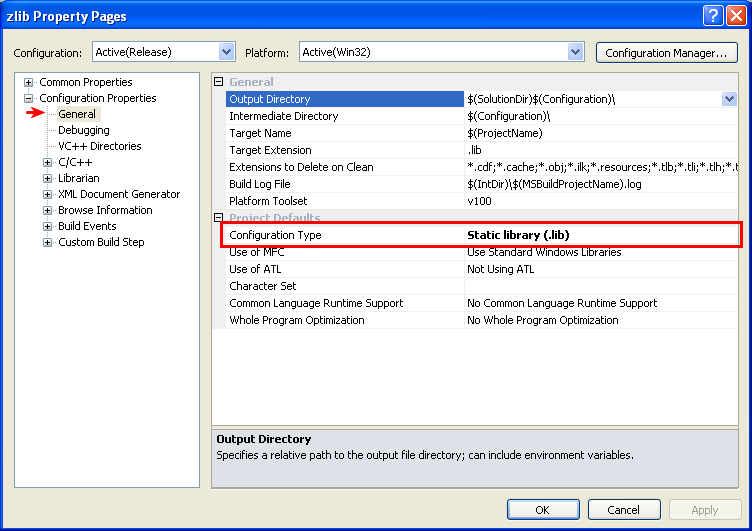
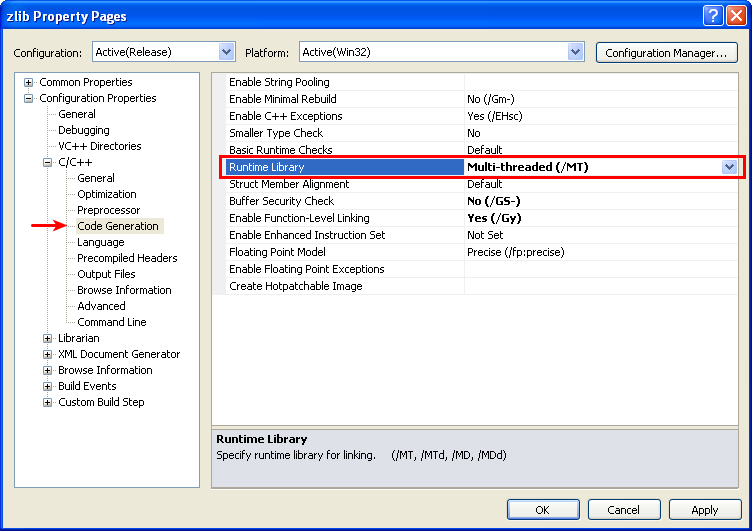
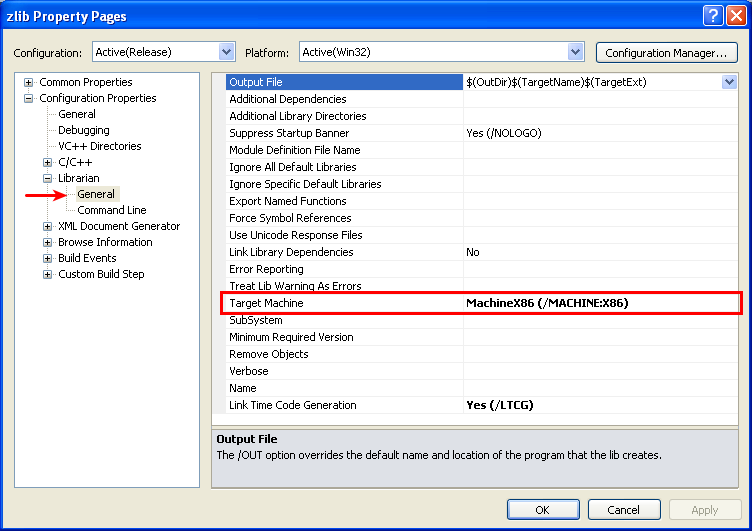
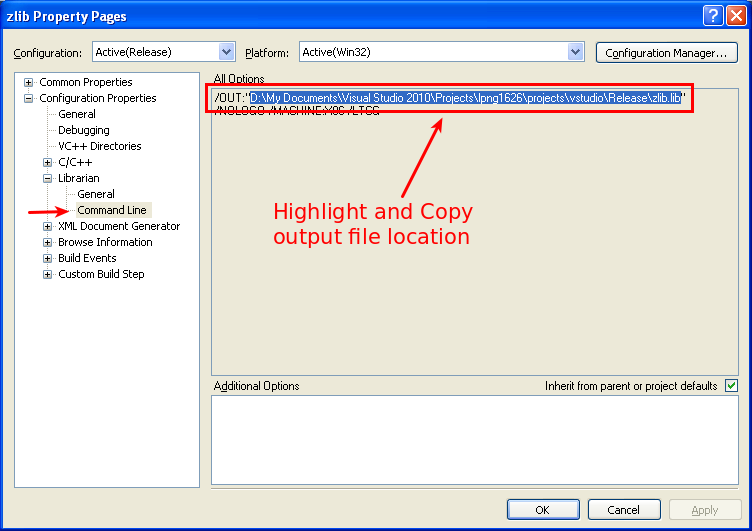
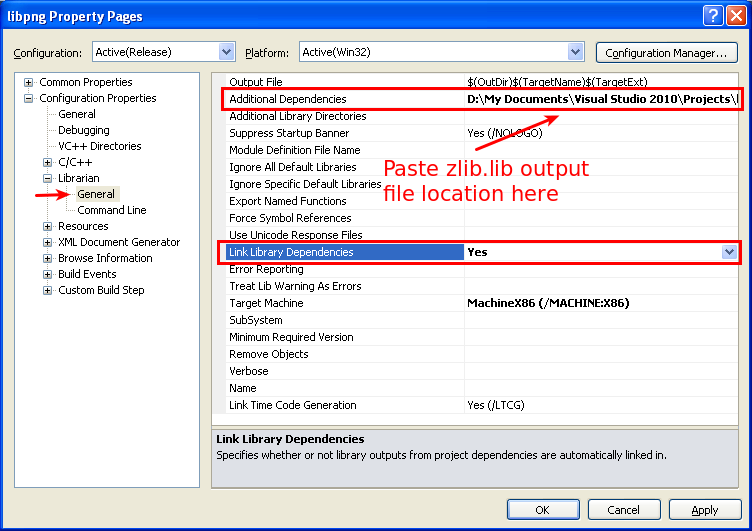
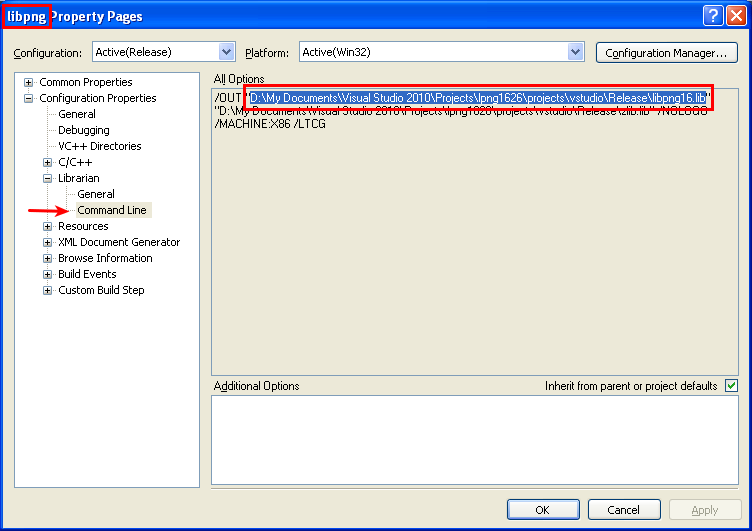
Make sure Visual C (Visual Studio) is loaded. Mine is the free Visual C/C++ 2010 Express. Locate the Projects directory for Visual Studio.Download the source files for zlib and libpng. You can find them by Googling “zlib source” and “libpng source”. Look carefully at the choices – you want the sources, NOT the compiled versions, and the ZIP format is probably the easiest for Windows to deal with. Unpack the ZIP files.Click down into the directories you just expanded to make sure there are source files there. Depending on how you did the expansion, the source may actually be in another folder with the same name inside the first folder. For the next step, you want to move whichever folder contains the source itself.Move or copy the folders with libpng and zlib to the Projects folder for Visual Studio.Locate the solution file down in the directory hierarchy. It is at D:\My Documents\Visual Studio 2010\Projects\lpng1626\projects\vstudio in this case. DO NOT DOUBLE CLICK on this file name. Visual studio will be suspicious of a foreign file, and will probably silently refuse to open it. Just note the location for now.Start Visual c++ 2010 Express by itself. Navigate to the solution file from the previous step, and open it.In the Solution Explorer pane at the left, double click on one of the sources in libpng, and also in zlib. If files do not open, double-check that you have copied files to the right places.In this case, I want a Release version, which will be smaller and faster than a Debug one. So right click on the Solution, and open the properties.Set all of the fields shown to “Release”, if they are not already set that way. Important: if you will be linking with code being developed as Debug, you must choose Debug. Basically, this setting must match the code you will be linking to.If you were to click “Build Solution” at this point, you might get errors like this, which are really just warnings, but will cause the build to fail. To fix these, locate the files that are giving warnings, right-click on them, and open properties. (In this case, it is the file, pngvalid.c)Under configuration properties -> c/c++ -> General, set “Treat Warnings as Errors” to No. Click Apply or OK. You will need to repeat this process on other files generating warnings.Click on “Build Solution”. As part of the build, the test programs will run to validate that the build was good. You can scroll through the output window if you like, looking for anything that says “FAIL”. The output of a successful build is shown here.The library built above could be used as-is. But I want a static library for libpng, not the one that loads a DLL. Additional steps are required. Right-click on the zlib project, and open Properties. Set the configuration type to “Static library (.lib)”On the C/C++ General section on the same page, set the Runtime Library to “Multi-Threaded (/MT)”. This will make the library include everything, so that even Microsoft DLL’s will not need to be loaded.Optional step. On the Librarian -> General section on the same page, set the Target Machine appropriately. In this picture, it is set to x86, but very possibly, you will want x64 or some other machine.On the Librarian -> Command Line section on the same page, highlight and copy the name of the output file. In this case, it is “D:\My Documents\Visual Studio 2010\Projects\lpng1626\projects\vstudio\Release\zlib.lib” Click Apply and OK.Right-click on libpng to open the Properties. Go to Librarian -> General, and under Additional Dependencies, paste in the name copied in the previous step. Set the Link Library Dependencies to Yes. These two actions will force the needed parts of zlib.lib to be incorporated into libpng.lib .
While the libpng Properties are open, change them to compile a Static Library, and use the Multi-threaded (Not Mult-threaded dll) models, as was done previously for zlib Properties.
Rebuild the whole solution. If you are unsure where the compiled libraries will be, check the command line under Properties of the libpng project. It should now be possible to take libpng16.lib and use it to compile a program without the need for additional dll’s. Note that the header files will be required, too.
Note: the test programs will need to be adjusted if you want to use them to test the static libraries. This is left as an exercise for the reader.